There are few gardening moments as satisfying as plunging a fork into the soil and unearthing a cluster of fresh, homegrown potatoes. It’s a rewarding experience that connects you directly to your food. This guide is designed to walk you, step-by-step, through the entire process. We will cover everything you need to know to achieve a successful and bountiful potato harvest, from choosing the right varieties and planting them correctly to essential care, troubleshooting common issues, and finally, harvesting and storing your crop.
Choosing the right potatoes and preparing for planting
Success begins with selecting the right foundation for your crop. Understanding the different types of potatoes and preparing them properly before they even touch the soil is the first critical step.
Understanding potato varieties
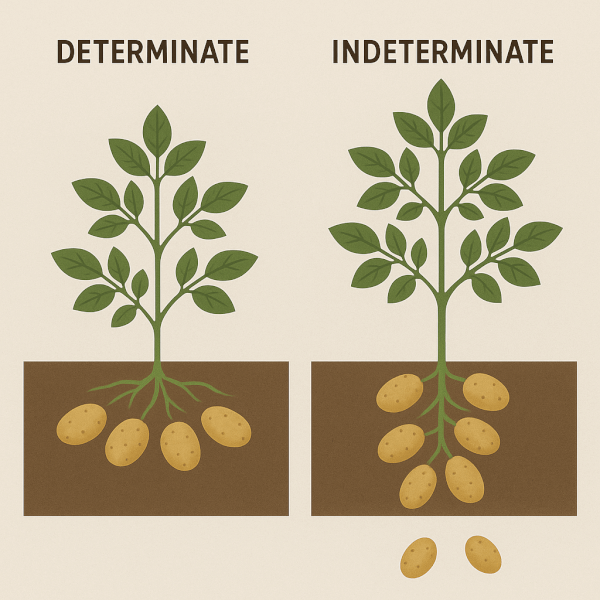
Before you buy, it’s helpful to know the main categories of potatoes. The most important distinction for your garden setup is between determinate and indeterminate types. Determinate, or bush potatoes, produce tubers in one layer just below the soil surface. They require less hilling and are great for containers. Indeterminate varieties grow more like vines and will set tubers all the way up the buried stem, meaning they require more hilling but can produce a larger harvest if you have the space.
Potatoes are also classified by their harvest time:
- First earlies: These are the quickest, ready to harvest in about 10-12 weeks. They produce smaller “new potatoes” and don’t store for long.
- Second earlies: These take a bit longer, around 13-15 weeks, and typically produce a larger crop than first earlies.
- Maincrop: These are the long-haul varieties, taking up to 20 weeks to mature. They produce large potatoes that are ideal for long-term storage over the winter.
Choosing a variety comes down to your available space and when you’d like to be harvesting. If you have a small patio, a determinate first-early variety in a grow bag is a perfect choice. If you have a large garden plot, a maincrop indeterminate variety will give you the biggest reward for your efforts.
Why you should use certified seed potatoes
You should always start with certified seed potatoes because they are guaranteed to be disease-free. Using potatoes from the grocery store is a gamble that can introduce devastating diseases like blight or scab into your garden soil for years to come.
Store-bought eating potatoes are often treated with sprout inhibitors to prolong their shelf life, which means they may not sprout at all, or will do so very weakly. Certified seed potatoes, available from garden centers and online suppliers, are grown specifically for planting and will give you the healthiest, most vigorous start to your crop.
The process of ‘chitting’ potatoes
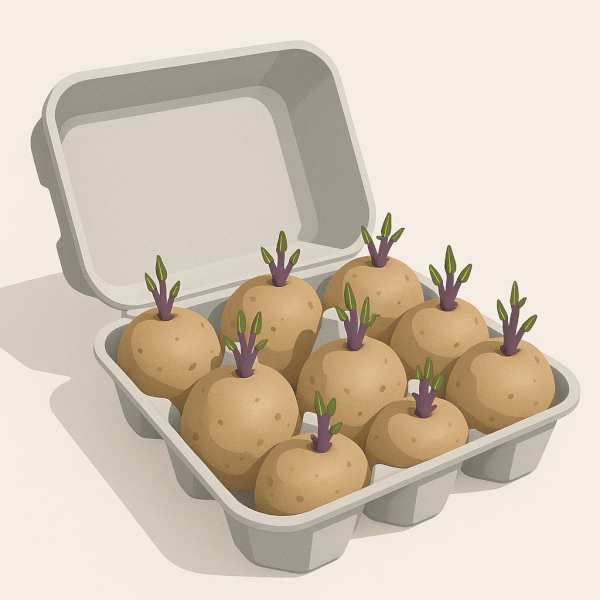
Chitting is the simple process of encouraging your seed potatoes to sprout before you plant them. This gives them a valuable head start on the growing season and can lead to an earlier, more robust harvest.
The process is easy:
- A few weeks before you plan to plant, place your seed potatoes in a single layer in an egg carton or a seed tray.
- Position them with the ‘rose end’—the end with the most small dimples or ‘eyes’—facing up.
- Place the tray in a cool, bright, but frost-free location away from direct sunlight. I find a cool windowsill that doesn’t get direct sun is perfect for this process.
- After a few weeks, you will see short, sturdy, purple-green sprouts emerge from the eyes. Your potatoes are now chitted and ready for planting.
Preparing your soil and planting your potatoes
With your seed potatoes chitted and ready, the next step is to create the perfect home for them to grow in.
Ideal soil conditions
Potatoes thrive in loose, well-drained, and slightly acidic soil (with a pH between 5.0 and 6.0). Heavy clay soil can become waterlogged and may result in rotten or misshapen tubers, while overly sandy soil will drain too quickly.
The best way to prepare your patch is to dig in plenty of organic matter, like well-rotted compost or manure, ideally in the autumn before planting. This improves soil structure, drainage, and fertility. If you have heavy clay, this will help lighten it. If your soil is sandy, it will help it retain necessary moisture.
How to plant potatoes in the ground
The traditional trench method is a straightforward and effective way to plant your potatoes.
- Dig a trench that is about 4-6 inches (10-15 cm) deep.
- Place the chitted seed potatoes in the trench, sprout-side up, spacing them about 12 inches (30 cm) apart.
- If you are planting multiple rows, space the trenches about 24-30 inches (60-75 cm) apart. This gap is crucial as it leaves you enough soil to use for ‘hilling’ later on.
- Gently cover the potatoes with soil from the trench.
Alternative methods: growing in containers or grow bags
If you’re short on space, don’t worry—potatoes grow exceptionally well in containers or large grow bags. This method is perfect for patios and balconies and has the added benefit of reducing the risk of soil-borne pests and diseases.
- Choose a large container or grow bag (at least 10 gallons).
- Add a 4-6 inch layer of a good quality potting mix or compost to the bottom.
- Place 3-4 seed potatoes on top of the soil, spaced evenly apart.
- Cover them with another 4-6 inches of compost.
- As the potato plants grow, you will continue to add more soil around them until you reach the top of the container. This acts as the hilling process, protecting your developing tubers.
Caring for your potato plants
Once your potatoes are in the ground, consistent care will ensure they grow strong and produce a healthy crop.
Watering best practices
Consistent moisture is vital for potato development. The most critical period for watering is when the plants begin to flower, as this is when the tubers start to form beneath the surface.
Aim to keep the soil evenly moist but never waterlogged. Check the soil by pushing your finger in a few inches; if it feels dry, it’s time to water. Water deeply at the base of the plants. Inconsistent watering, such as long dry spells followed by a heavy drenching, can cause problems like hollow centers or cracked and split potatoes.
The importance of ‘hilling’ or ‘earthing up’
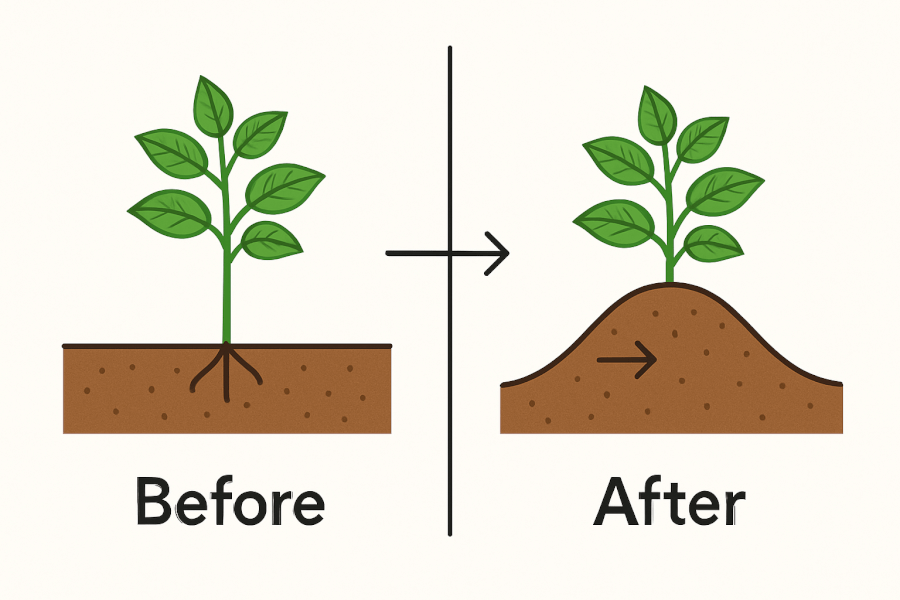
Hilling is the process of drawing soil up around the base of the growing potato plant. It is one of the most important steps in potato care for two primary reasons:
- It protects tubers from sunlight. When developing potatoes are exposed to light, they turn green. This green skin contains solanine, a toxic compound that makes the potato bitter and inedible. Hilling keeps them safely in the dark.
- It increases your harvest. For indeterminate varieties, hilling encourages the buried portion of the stem to produce more tubers, leading to a much larger yield.
When your potato plants reach about 8 inches tall, use a hoe or rake to gently draw soil from between the rows up against the plants, burying about half of the stem. You will need to repeat this process 2-3 times during the growing season as the plants get taller.
Fertilizing your potato plants
Potatoes are heavy feeders and require plenty of nutrients to produce a good crop. If you have prepared your soil with plenty of rich compost, you may not need much additional fertilizer. However, for an extra boost, you can work a balanced, slow-release granular fertilizer into the soil at planting time. A fertilizer that is slightly higher in potassium (the ‘K’ in N-P-K) is beneficial for tuber development. You can add another light application during one of your later hilling sessions if your plants seem to need it.
Managing common potato pests and diseases
Vigilance is key to catching any potential problems before they can ruin your crop. Here are a few of the most common issues to watch for.
Identifying and preventing potato blight
Potato blight is a devastating fungal disease that can spread rapidly in warm, wet weather. The first signs are brown patches appearing on the leaves, often with a fuzzy white fungal growth on the undersides.
Prevention is the best defense. According to the Royal Horticultural Society, ensuring good air circulation between plants is key to allowing foliage to dry quickly after rain. Always water at the base of the plant to keep the leaves dry. The most effective preventative measure is to choose modern, blight-resistant potato varieties when you buy your seed potatoes. For more information on prevention, see the guidance from the RHS on managing potato blight.
Dealing with common pests
The most notorious potato pest is the Colorado potato beetle. The adults are yellow-orange with black stripes, but it’s their plump, reddish larvae that do the most damage by chewing through the leaves. The best control method in a home garden is to inspect your plants regularly and hand-pick any beetles or larvae you find, dropping them into a bucket of soapy water. Encouraging beneficial insects like ladybugs can also help control their numbers.
Common potato problems troubleshooting table
| Problem | Symptom | Cause & Solution |
|---|---|---|
| Green Potatoes | Green skin on tubers | Sun exposure. Hill plants properly to keep tubers covered. Cut away all green parts before eating; do not eat the green skin. |
| Potato Scab | Rough, corky, scabby patches on the skin | Soil pH is too high (alkaline). Avoid adding lime to your potato patch. Consistent watering can also help prevent scab. |
| Hollow Heart | A hollow, discolored cavity in the center of the potato | Inconsistent watering or a sudden growth spurt. Ensure you maintain even soil moisture throughout the growing season. |
Harvesting and storing your potato crop
After months of care, the time has finally come to reap your rewards. Knowing when and how to harvest and store your potatoes will ensure you can enjoy them for months to come.
When and how to harvest
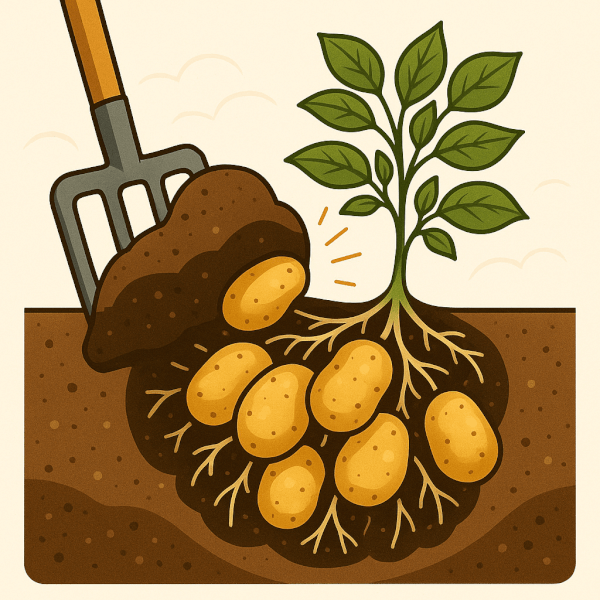
The timing of your harvest depends on the type of potato you planted.
- For ‘new potatoes’: You can start harvesting first and second early varieties about 2-3 weeks after the plants have finished flowering. These will be small, thin-skinned potatoes perfect for boiling or steaming. Carefully dig around the base of a plant with your hands or a small trowel to “rob” a few tubers without disturbing the entire plant.
- For maincrop/storage potatoes: The key signal is the foliage. Wait until the leaves and stems have completely turned yellow and died back. This indicates the plant’s energy has gone into the tubers and their skins have started to thicken for storage.
To harvest the full crop, use a digging fork or a pitchfork rather than a spade, which can easily slice through potatoes. Start digging about a foot away from the center of the plant to avoid accidental damage. There’s nothing quite like the thrill of that first harvest, but I learned early on to start digging wider than you think. It’s the best way to avoid the disappointment of accidentally slicing a beautiful potato in half with your fork.
The ‘curing’ process for longer storage
Before you put your maincrop potatoes away for the winter, they need to be cured. Curing allows their skins to thicken and harden, which heals any minor cuts or bruises from harvesting and seals out diseases, dramatically improving their storage life.
Simply lay your unwashed potatoes out in a single layer—do not wash them, as the moisture can encourage rot. Place them in a dark, dry, and well-ventilated space like a garage or shed for about one to two weeks.
Best practices for long-term storage
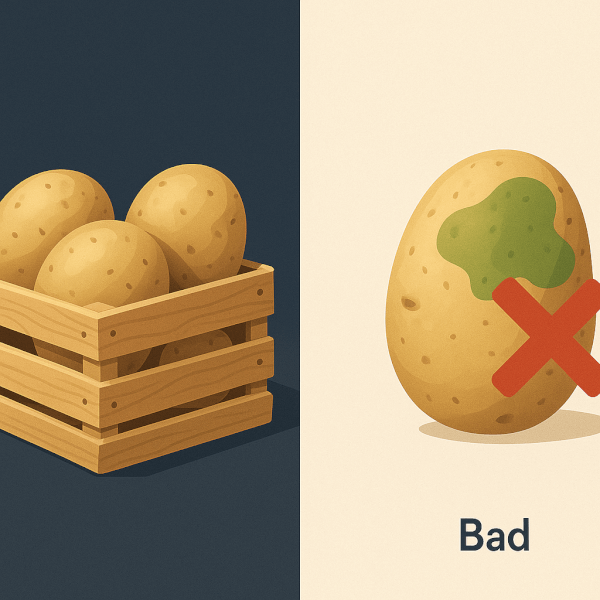
Once cured, your potatoes are ready for storage. The ideal conditions are a cool, dark, and dry place where the temperature is consistently around 45-50°F (7-10°C). A cellar, an unheated garage, or a cool pantry are all good options.
Avoid storing potatoes in the refrigerator. The cold temperature causes the potato’s starch to convert to sugar, which negatively affects their taste and texture when cooked.
Store them in burlap sacks, ventilated crates, or even cardboard boxes with some holes punched in them for airflow. Finally, never store your potatoes next to onions. Onions release ethylene gas, which will cause your potatoes to sprout prematurely.
Key takeaways for a successful potato harvest
- Always begin with certified seed potatoes to ensure a disease-free start, and give them a head start by chitting them before planting.
- Prepare your garden bed with loose, well-drained soil and plenty of organic compost.
- Remember to ‘hill’ your plants by drawing soil up around the stems to protect the tubers from sunlight and increase your overall yield.
- Water consistently, especially when the plants are flowering, to prevent issues like hollow heart and scab.
- For storage potatoes, wait until the foliage has completely died back before harvesting, and always cure them in a dark, dry place for two weeks before storing them long-term.
Frequently asked questions about growing potatoes
How long do potatoes take to grow?
Potatoes typically take between 70 to 120 days to grow to maturity. The exact time depends on the variety. First earlies can be ready for harvest as ‘new potatoes’ in as little as 10 weeks, while maincrop varieties grown for storage will take the full 15 to 20 weeks.
Can I grow potatoes from a store-bought potato?
While it is technically possible for a store-bought potato to sprout and grow, it is not recommended. Supermarket potatoes are often treated with sprout inhibitors and, more importantly, can carry diseases that will infect your garden soil for years. Always use certified seed potatoes.
What happens if you don’t ‘hill’ potatoes?
If you don’t hill potatoes, you risk the developing tubers near the surface being exposed to sunlight. This turns them green and toxic, making them inedible. You may also get a smaller harvest, as hilling provides more space along the stem for indeterminate varieties to produce more tubers.
Conclusion
Growing your own potatoes is a simple and immensely rewarding process. From the initial preparation to the final, exciting harvest, it’s a journey that ends with delicious, fresh food on your table. By choosing the right variety, preparing your soil, and providing consistent care, anyone can achieve a bountiful crop.
Now that you’ve mastered potatoes, why not try our guide to growing carrots?


